Showing posts with label baking. Show all posts

Thursday, 18 June 2015

WATERMELON ICE CREAM POTS

WATERMELON ICE CREAM POTS


These watermelon ice-cream pots are perfect for summer! In this recipe I have made my own ice cream but you can also just by strawberry flavoured ice cream instead if you do not want to make the ice cream! 

What you will need:

  • 400g strawberries
  • 200ml double cream
  • 75g sugar
  • 1 tsp vanilla essence
  • 1 1/2 bars white chocolate
  • dark chocolate chips
  • balloons

Method:

  • Firstly, wash your strawberries and then cut the stalks off. Then cut them in half.
  • Place these on a baking tray and cover with brown sugar.
  • Place these in the oven at 170'c for 15-20 minutes.
 
  • When these are done they will be all soft and caramelised and it smells delicious!
  • Place these roasted strawberries into a blender and blend it all up! Once this is done leave aside for later.
 
  • Now melt your white chocolate in the microwave.
  • You will need to temper your chocolate as this will help the bowls stay together. Click here and scroll down for instructions on how to temper chocolate and why you should temper chocolate.
  • Once this is all melted, colour your white chocolate a dark green. I have really bad food colourings so mine didn't go as dark as I wanted it to go but it was still green!
 
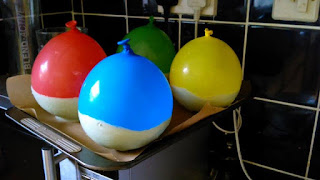
  • Now for the fun part! Wash your balloons in cold water and then blow up as many or as little balloons as you would like to use, however tie them off when they reach the size of a tennis ball.
  • Then dip the bottom of the balloons into the green chocolate and then place these onto a baking tray to set.


  • I accidently made my balloons too big and so there wasn't enough ice cream to fill them up so I would advise you to make them smaller than I did!
 
 
  • Now back to the ice cream! Whip up the double cream and then add the sugar and vanilla essence. Then pour in the strawberry purée over a sieve to get rid of all the seeds. Fold it all together.
  • If you have an ice cream mixer you can add the mixture to that now for about 40 minutes to an hour. This will add air to the ice cream whilst it freezes to make the ice cream nice and fluffy in texture.
  • Then you can go ahead and test to see if your chocolate pots have set. They should be firm and easily pull away from the baking paper. If so then pop the balloons.
  •  
 
  • Then pour the ice cream into each bowl and add chocolate chips to make the seeds of a watermelon. ( If you don't have an ice cream maker then just go straight to this step)
  • Freeze for 2-6 hours and then enjoy!!!!!!!


Thursday, 11 June 2015

RAINBOW CHEESECAKE- baking

RAINBOW CHEESECAKE


Ingredients:

  • 900g of cream cheese (3 packets)
  • 250g caster sugar
  • 3tbsp plain flour
  • 1 1/2 tsp vanilla essence
  • 1 lemon zest and juice
  • 3 large eggs plus 1 egg yolk
  • 200ml soured cream
  • 5 food colourings of your choice
  • 300g digestive biscuits
  • 150g butter (melted)

Method:

  • Pre-heat the oven to 160'c
  • Firstly crush the biscuits into breadcrumbs and then stir in the melted butter.
  • Then press this into a cake tin that has tall sides as this recipe makes a lot of cheesecake!
  • Bake this in the oven for 10 minutes and then leave this to cool down whilst you make your cheesecake mixture.
 
  • Turn the heat on the oven up to 200'c
  • Then with an electric whisk, beat the cream cheese in a bowl until creamy.
  • Then gradually add the caster sugar on a slow speed, then add the flour and a pinch of salt.
  • Then add the vanilla, lemon zest and juice
 
  • Then whisk in the eggs and yolk, one at a time until all combined, then add the soured cream.
Split the filling into 5 different bowls and then colour them any colour you would like.


I did orange, yellow, pink, green and blue.

 
  • Place some tinfoil under your cake tin and fold it up the sides to prevent mixture from spilling out and then put the cake tin inside a roasting tin.
  • Then pour the colours one at a time over the baked biscuit base. Its okay if some merge together, just make sure you pour them gently into the tin.
  • Bake in the oven for 15 minutes and then reduce the temperature to 110'c and bake for another 25 minutes
  • Once this this done the cheesecake may still have a slight wobble but don't worry that will set!
  • Turn the oven off but leave the cheesecake in the oven for another 2 hours to set.
  • Once this 2 hours is over, leave to set in the fridge for another 4-8hours or over night for a better taste!
  • Then enjoy this colourful cheesecake that's bound to put a smile on anyone's face!


Thursday, 4 June 2015

AMAZING BROWNIES- Baking

BROWNIES!

Welcome back to baking on Almost1998! I'm sorry its been a while, but now that exams have finished I have had more time to bake yay!
This week I made brownies which have got to be my favourite unhealthy snack to eat because they are so heavenly.
 

INGREDIENTS:

  • 185g butter
  • 185g chocolate (dark is best)
  • 85g flour
  • 40g cocoa powder
  • 100g chocolate chips/chunks
  • 50g marshmallows (optional)
  • 50g chopped cashew nuts (optional)
  • 3 eggs
  • 275g caster sugar
 

MEHTOD:

  • Preheat the oven to 180'c
  • Firstly, in a saucepan, heat 185g of butter and chocolate together until it is all melted. To make sure that the chocolate doesn't burn as is melts quicker than the butter, chop the butter up into cubes.
In a separate bowl add in the caster sugar and 3 eggs. With an electric whisk, mix these together for around 3 minutes so that the mixture has almost doubled in size and it looks like vanilla milkshake.
 

  • Then add the chocolate and butter mixture when it is slightly cooler as you do not want it to cook the eggs and have lumps in your mixture.
  • Then you can whisk it all together until it is all combined
  • Now you can add the chocolate chunks and the optional nuts and marshmallows. Fold these ingredients in with a spoon or a spatula if you have one.
  • Now sift together the flour and cocoa powder in a separate bowl and then lightly fold that into the brownie mixture.
  • Now pop that into a baking tray and then it can go into the oven for 25 minutes.
  • When it is done it may still have a wobble in the middle of the brownie. This means that your brownies will have a squidgy centre but if you do not like this then put them back in the oven for another 5 minutes.
 
 
Hope you enjoyed this post! I forgot to take a picture of the end product and when I remembered everyone had already eaten them!
See you next week!


Thursday, 7 May 2015

NUTELLA TEAR AND SHARE: Baking

NUTELLA TEAR AND SHARE


You will need:

  • 400g bread flour
  • 75g sugar
  • 2 teaspoons of dried yeast
  • 1 pinch of salt
  • 30g unsalted meted butter
  • 180g warmed milk
  • 2 egg yolks (keep the whites)
  • A couple tbsp of nutella

Method:

  • Pre heat your oven to 180'C 
  • Add the flour, salt, sugar and yeast into a bowl. Make sure you put the yeast on a sepreate side of the bowel to stop the salt and yeast activating together.
  • Then add the melted butter (you can do this is a microwave) and the warmed milk.
  • Then add the 2 egg yolks and mix all together until it has formed a dough.
  • Now it is time to knead your dough, which if i'm honest, is basically a muscle workout which you will be doing for 15 minutes so enjoy!
  • You will want the dough to become elasticated and soft enough so that when you press a hole in it with your finger, it bounces back into its original shape.
  • Then, pop this dough into a bowl and cover it with cling film. It is ideal to then leave it to rise in a warm environment (i used my airing cupboard) for 3-4 hours. I know this sounds like a long rise but it will give you a really nice light and fluffy bread in the end!

-4 hours later-

  • Now you can get your dough out of the bowl and cut it into three sections. 
  • Take one section and roll it out thin enough to fit a plate on it. 
  • Then smother nutella in the area where the plate went.
  • Roll out the second ball of dough and then put this over the top the first layer
  • Put the plate on top again to mark where the nutella on the previous layer went and then cover that area with nutella.
  • Roll out the third ball and pop this over the second layer.
  • Put the plate on top however this time leave it on top and cut around the plate to remove excess dough that was not covered in nutella.

  • Now, place a cup in the center of the circle and push down slightly to make an indent in the dough.
  • Cut the dough into quarters but do not cut into the small circle you just made in the middle. Cut the quarters you just made in half and then half again so you end up with something looking like this.
  • Now, as seen in the picture, you need to take two pieces and twist them away from each other twice. 
  • keep repeating this until you have twisted all sections.
  • Once you have done this, take the ends of each pair you twisted and join them together at the ends.
  • Use the egg whites that you saved from the used egg yolks to brush over and make the bread look shiny and then leave this to rise for another 20 minutes.
  • Once it has risen, cook in the oven for 15 minutes and then enjoooooooooooooooy. p.s it may seem like this takes forever to make but it's totally worth it;)

Thursday, 23 April 2015

Jaffa Cakes!- Baking


JAFFA CAKES!


So earlier this week I was sat in lesson struggling to think of what to make for this weeks post when I turned to see Charlotte, a fellow member of Almost1998, scoffing her face with Jaffa cakes. As I result of this, I thought why not have a go at making my own Jaffa cakes and they turned out tasting brilliant (not too brilliant on the presentation however!)
 

Method;

So firstly you will need to pre heat the oven to 190 degrees C. Then you will need:

  • 4 eggs
  • 125g sugar
  • 125g self raising flour
  • 50g melted butter
  • 1 zest of an orange
Firstly, crack the eggs into the bowl and add the orange zest and sugar, then start whisking! You will need an electric mixer for this otherwise its going to take you forever to whisk it all up! Keep whisking on a high speed for about 10 minutes or until the mixture has doubled in size and gone pale and thick enough for it to leave streaks in the mixture. Then with a spoon, very gently fold in the melted butter and the flour. You have to mix this in extremely gently as you do not want to force any air out. At first it may seem like the flour is never going to mix in, but keep going and you'll get there! Then pour this into a greased square tin and bake in the oven for 18 minutes.
When the cake is cooked, leave in the tin to cool down completely and then find a round cookie cutter in the size you would like your cakes to be.


 I cut out 9 pieces and then cut them in half so I had 18 cakes in total


To make these quick and easy, instead of making the jelly, I decided to buy the little pots and use that for the filling. To do this all I did was chop the jelly up into thin circles and pop them on top of the cakes.


Now for my favourite part- the chocolate! I didn't put it in the microwave in large chunks straight away though! If you heat it too much the particles in the cocoa butter over heat and break and therefore do not reform again which means that your chocolate will not set. To reduce this you are meant to grate the chocolate so that it takes less heat to melt it however I am not patient enough to grate 2 bars of chocolate and so I used a smoothie mixer and that worked just fine!
Then you can go ahead and melt the chocolate and then pop it in a piping bag and pipe over the jelly and cake! Once everything is assembled, make yourself a cup of tea and enjoy!

Thursday, 9 April 2015

SUSHI POPIN' COOKIN!- Baking

 Sushi Popin' cookin!


For a long time I have wanted to try out Popin' cookin! which is a Japanese candy making set. I know I know it's not baking, but I thought i'd share with you how to make up the 'sushi' and give you a little review on how it tastes and my overall opinion.
I bought this set on amazon for £3.50 here and it took about 3 weeks to come considering it was coming to England from Japan.
Included in the box was:
  • 6 powders which make up your rice, salmon, egg, fish eggs and soy sauce (please note that these are all candy flavoured)
  • Fondant which is used for seaweed
  • A tray to make your ingredients
  • a spoon
  • a pipette
Since all of the instructions are in Japanese I had to turn to Youtube to find out how to actually make up the sushi! It turns out it is quite straight forward and really quick to make! When opening the packet cut along the dotted line and open the sheet up for guidelines to make your sushi!
Firstly to make your rice you will need to fill the oval shaped tray up with water until it reaches the end of the line of the oval shape. Then add the blue packet and mix until all combined.
 
Then to make the egg and the salmon, fill the two trays which have weird shapes in them up with water until it reaches the line. Then add the yellow packet to one and the pink packet to the other and mix. Make sure you smooth them out to make the mixture meet all the edges and then leave it to set.
 
Now for the coolest bit- the fish eggs! Fill tray A and B up with water until it reaches the line and then add the green packet to tray A and the orange packet to tray B and mix. Use the petite to pick up some of the orange mixture and drop it into tray B.
 
 
Then fill the left over tray with water until it reaches the mark and then add the brown packet to make your soy sauce!
To assemble the sushi, roll out the seaweed to the length suggested for you on the packet and then wrap it around a small ball of rice. Add some fish eggs and wollah you have made your first piece of sushi!
 
Not going to lie, it is hard to roll out the seaweed without it breaking, but its still fun to make!
Next you can be inventive and use up the rest of your ingredients to make more sushi!
 
I made this with my younger sister which kept her entertained whilst I was babysitting her and she was so excited by the fact that everything smelt of bubble-gum. However, the texture was horrific and was not something I'd choose to eat again!
Despite this, it was great fun to make and interesting to see how something that was a powder can turn into edible food.


Thursday, 2 April 2015

Easter Baking!

 Easter Baking!


Happy Easter everyone! So this week I wanted to make cream egg cupcakes as suggested by my friend Eleanor, however I searched far and wide and found no cream eggs ANYWHERE. So instead I had to improvise and make cakes baked in an egg!
Cake baked in an egg may sound strange however, you are left with an egg shaped cake which is perfect for Easter!


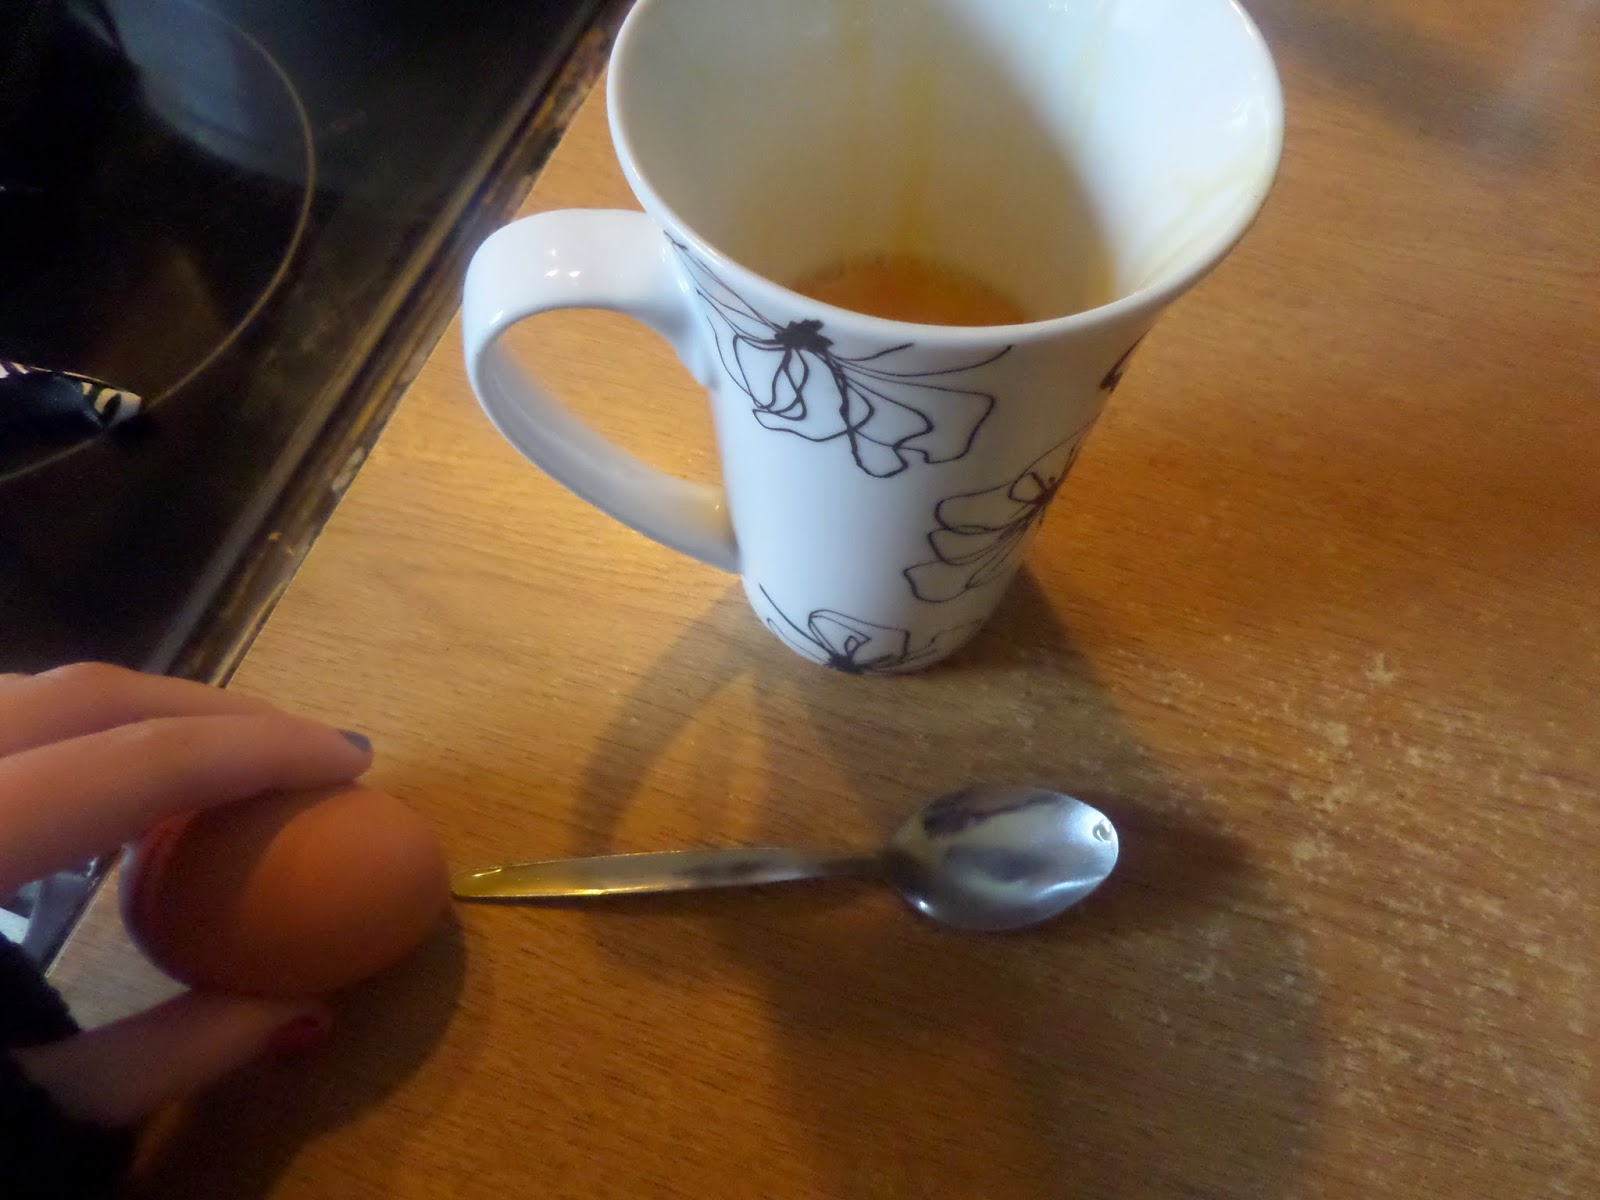
So firstly you want to take your eggs and a teaspoon. Use the teaspoon to poke a small hoe in the top of the egg. Then pour the egg out into a mug, using a teaspoon to break it up and help it come out. Then wash the eggs out with water and put them in hot salty water. Whilst these are soaking, make a simple cake mix (I did 140g sugar, butter, eggs and flour) and add any flavouring you'd like. I did lemon and poppy seed because its a nice spring flavour. I also used the eggs that had come from the shell ( I used four).
 
After you have made the cake batter, dry the outside of the egg shells and coat the inside with oil. Then pipe the mixture into the shells about 3/4 full. With the left over batter, make some cupcakes with mini eggs inside!
 
Fold some tinfoil into a cupcake tray to make a nest for the eggs to stay upright in. Then bake these for 15 minutes in a pre heated oven of 200'.
 
It is likely that your eggs will over flow like as shown above but don't worry, once the eggs are cooled you can scrape the cake off.
 
Then once the eggs are completely cooled, peel off the shell and melt some chocolate. Dip the cakes in the chocolate then sprinkle over some popping candy and pop in the fridge to set, then enjoy!
 
Have a good Easter!


Thursday, 26 March 2015

Marvellous sausage rolls: Baking

Marvellous Sausage Rolls:


Oh my goodness guys these are amazing not going to lie. I've been wanting to make these for you for ages and I've finally made them so enjoy!
 

Ingredients:

  • A pack of sausage meat
  • 1 onion
  • 1tbsp sugar
  • 2tbsp balsamic vinegar
  • 1tbsp breadcrumbs
  • 1 pack puff pastry
  • 1 egg
 
  • Method:

  • preheat your oven to 200 degrees
  • Firstly, cut 1 onion up into long slices (you most probably will cry doing this) and pop it into a frying pan that has been greased with butter. Cook these for about 2 minutes and then add the sugar and balsamic vinegar.
 
  • Whilst they are cooking, you can roll out your pastry. It will be easier if you cut the pack in half and roll out each section. You want to roll it out in a rectangle shape until its the width of a pound.
  • Once the onions are cooked (they will be soft and look caramelised) add them to the sausage meat with the breadcrumbs and mix together with your hands until its all combined.
  • Then pick up a small handful and squish it into a sausage looking shape and place it on the puff pastry as shown below:
Then brush egg around the sides of the pastry around the meat and then fold it over. Use a fork to seal it all together. Then you can brush them all over with egg and pop them on a baking tray to cook for 30 minutes.


Thursday, 19 March 2015

Cheese straws: Baking


Cheese Straws!


So this week I thought I'd switch things up a bit and do some savoury baking! These literally took me 15 minutes to make which is helpful because I was super hungry when I got home from school! Here is how to make these delicious snacks:
 

Ingredient's:

  • Puff pastry
  • Cheese
  • Milk
  • Flour


Method:

  • So firstly I am going to be using pre- made pastry simply because puff pastry takes a lot of time to make and I was being lazy.
  •  I cut a chunk out of this and rolled it out until it was about half a cm thick.
  • Then I cut small rectangles out and brushed them with milk so that the cheese can stick to them.
  • Then I sprinkled over some grated cheese
  • Then grab either end and twist
  • Cook in the oven for 12 minutes and then enjoy!


Blogger Template By Designer Blogs